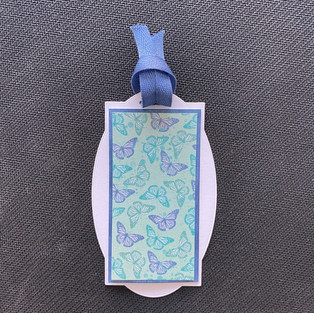
Springtime Bookmarks
- Apr 6, 2021
- 3 min read
I've taken a short break, but I'm back! Welcome to my blog for the first timers and a warm hello to those who have been following me for awhile. What better way to kick things off again than with a fresh spring project.
Most of you visiting this post are likely here to assemble this project that was included in your kid's Easter Scavenger Hunt goodie bag. While this was in the kid's goodie bag, I hope the both the kids and parents enjoy making this project together.

Bookmark Assembly Instructions
Before we get started:
Grab a glue stick or some liquid glue. I prefer liquid glue; it makes it a little easier to line up the layers of paper, but I will caution - use it sparingly so that it doesn't gush out the sides of your project.
Make sure you have the 5 pieces shown below. Designer patterned paper, a blue outlined piece of cardstock, a big white label with a slot and stamped sentiments on one side, a white butterfly, and a piece of blue ribbon.

Step 1:
Glue the Designer patterned paper to the blue outlined piece of cardstock. Make sure to look at both sides of the paper to pick your favorite pattern. Tip: If you don't have the right color paper, use a blending brush and ink, to make the color paper you need!

Step 2:
Glue the Designer patterned paper and the blue outlined cardstock onto the BLANK side of the big white label. Make sure to center it as best you can.
Step 3:
Add the ribbon to the bookmark. One way to do this, feed both tips of the ribbon through the slot, from the back side of the bookmark. Feed the tips through the remaining loop of the ribbon and pull tight. This process may fray the tips of the ribbon, so optionally you can cut the tips at an angle with really sharp scissors to make them crisp again.
Step 4:
Add the butterfly to the bookmark. I have added a mini glue dot to the back of each butterfly. Carefully remove the plastic backing from the glue dot and adhere the butterfly. Make sure you position it where you'd like, because the glue dot is very hard to reposition, but it's great for a quick, secure adhesive option.
Step 5:
Flip it over and sign your name under "Homemade By: " And please do email me a picture of your finished bookmark, I love to see the final creations. handcraftedbc@icloud.com

What's Next?
If you enjoyed doing this project with your kids, and if you or they love crafting, then I highly recommend this "Super Cool", ice cream and popsicle-themed craft kit available. 12 fresh, fun-shaped cards and envelopes for only $22. This all-inclusive kit comes with re-usable stamps, a stamp block, a mini ink spot, and all the paper, embellishments, and decor you need to complete the 12 cards and more! Check out the YouTube video below.

If you're interested in this kit, or want to learn more about these monthly craft kits, feel free to email me at handcraftedbc@icloud.com or see more details at bit.ly/paperpumpkinchay .
Supply List for the Springtime Bookmarks:
Make a Difference Photopolymer Stamps (Retired)
Butterfly Bijou Designer Patterned Paper (limited offering; Sold Out)
Hippo Happiness Bundle (Stamps & Dies) It's been 10% off since last year for this bundle. Bundle discount disappears 5/3/21.
Butterfly Brilliance Bundle 10% off
Misty Moonlight Ink & Ribbon (Ribbon is on clearance until 5/3/21)
Multi-purpose Tombow Liquid Glue


Comments